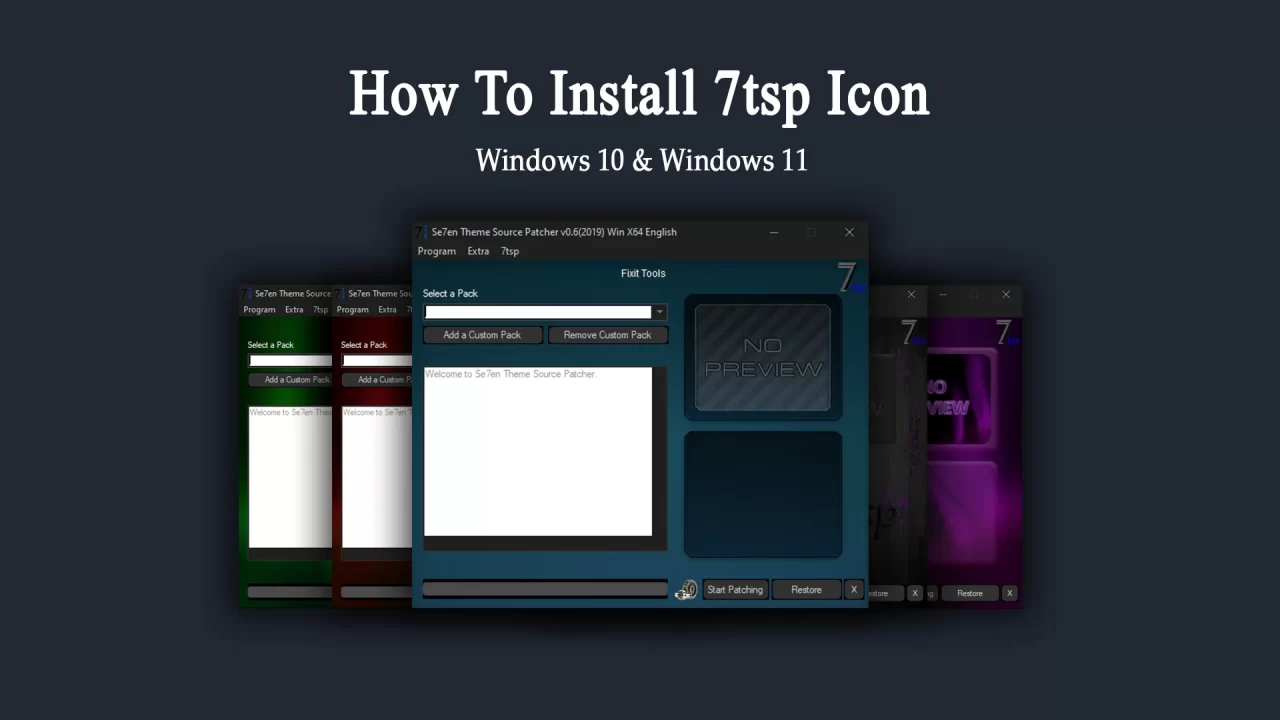
How to install 7tsp icon pack in windows 10 & 11
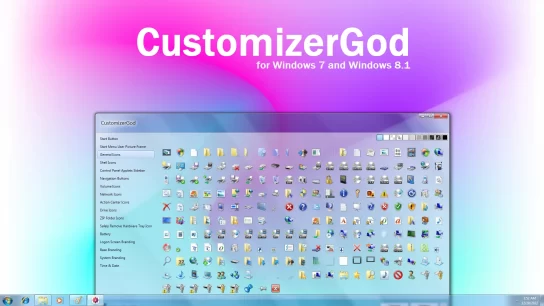
Customizing your Windows can be a fun and creative way to make your computer feel more personal. One way to do this is by changing your system icons, and 7TSP GUI 2019 Edition is a popular tool for accomplishing this task. This 7tsp tool is compatible with Windows 10 (version 1903 and later) and Windows 11.
What is 7tsp?
For instructions on how to uninstall 7tsp, please visit the following link: Uninstall 7tsp Icon Pack This guide will walk you through the steps to remove 7tsp from your Windows system.
Before You Begin:
Before you begin installing the 7tsp icon pack, ensure that you’ve downloaded the icon pack files. You can find these icon packs on various websites dedicated to Windows customization, including our website. Please make sure that the chosen icon pack is compatible with your Windows version (either 10 or 11).
7TSP Icon Installation:
- First, download and extract the 7tsp application. It will have an irregular name, rename it from 7tsp GUI v0.6 .ee to 7tsp GUI v0.6 .exe
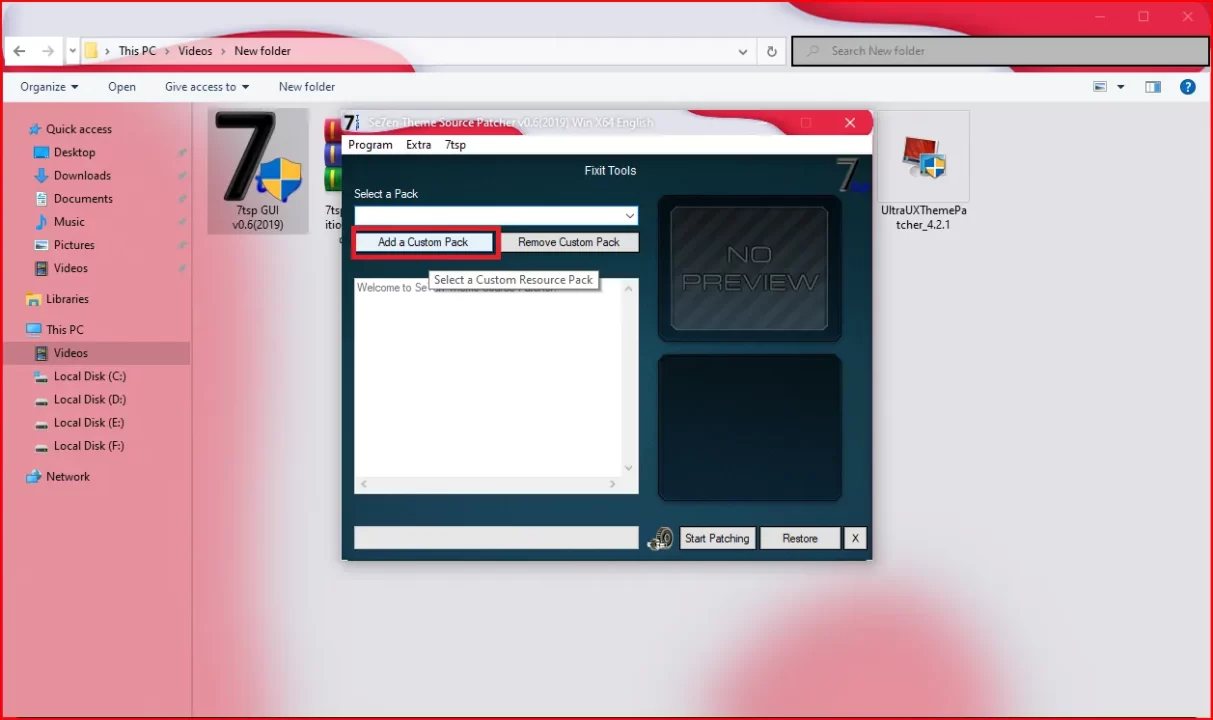
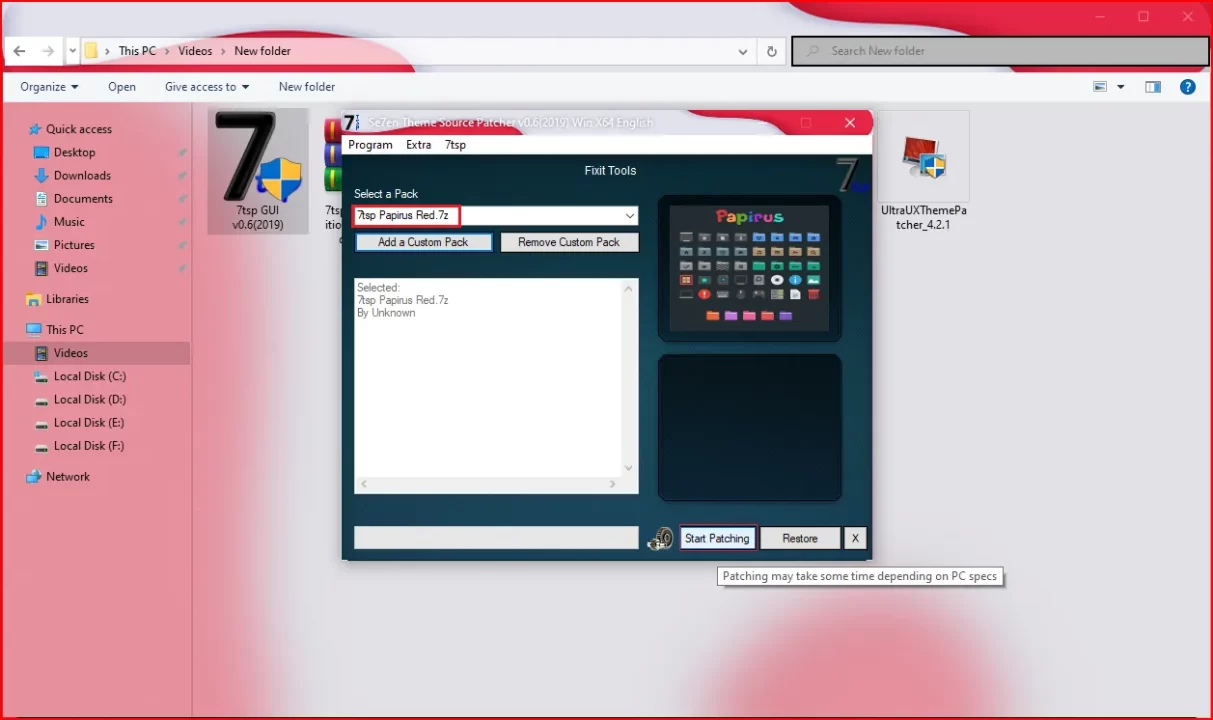
- Open the 7TSP application and click Add a Custom pack
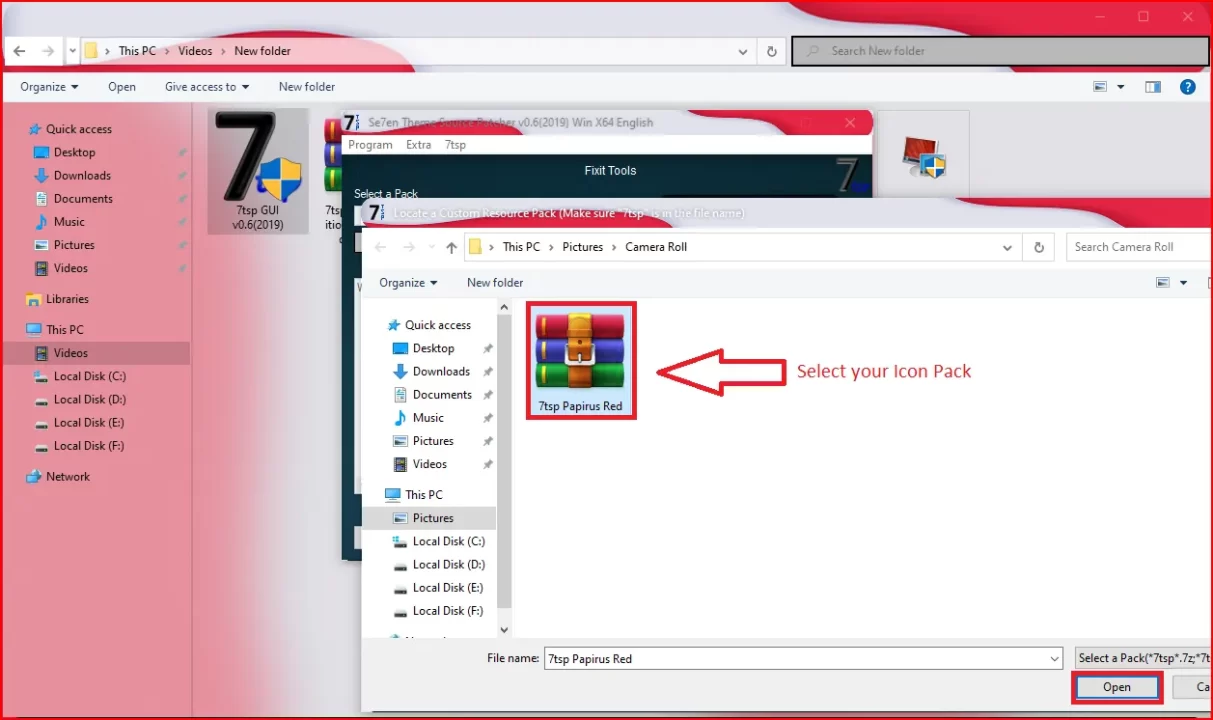
- Select the 7tsp icon you want to install
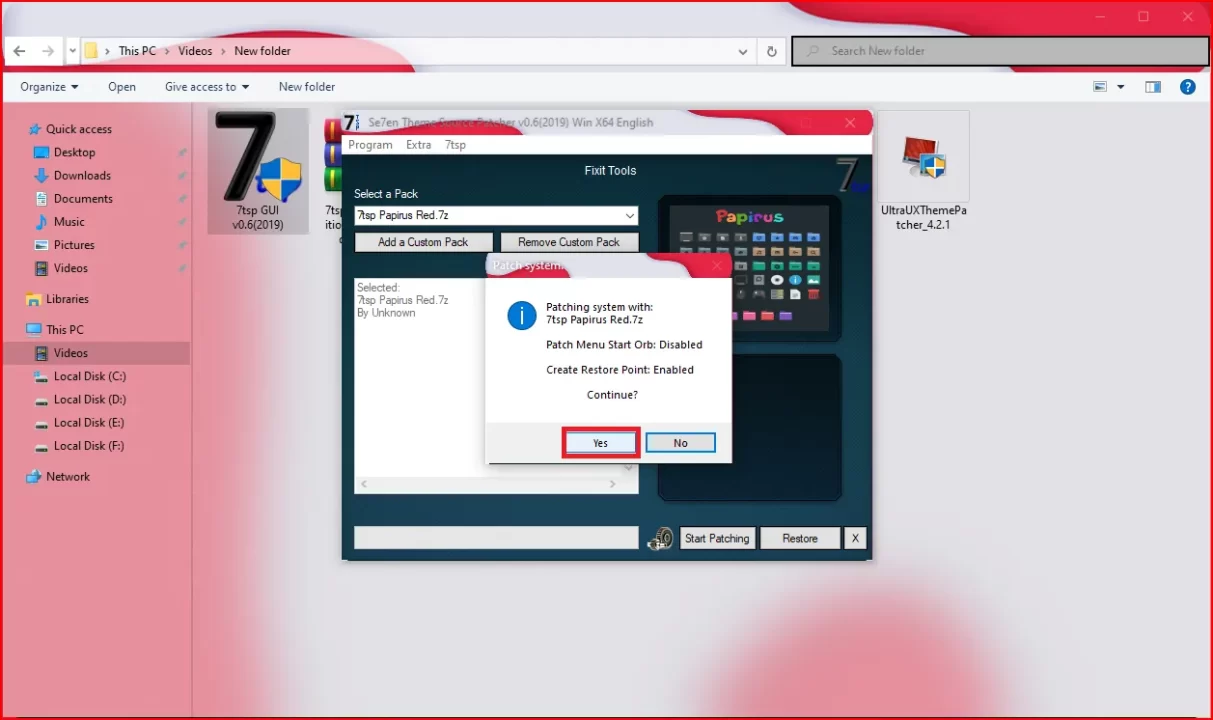
- Then click on Start Patching and click Yes to ask permission to create a restore point.
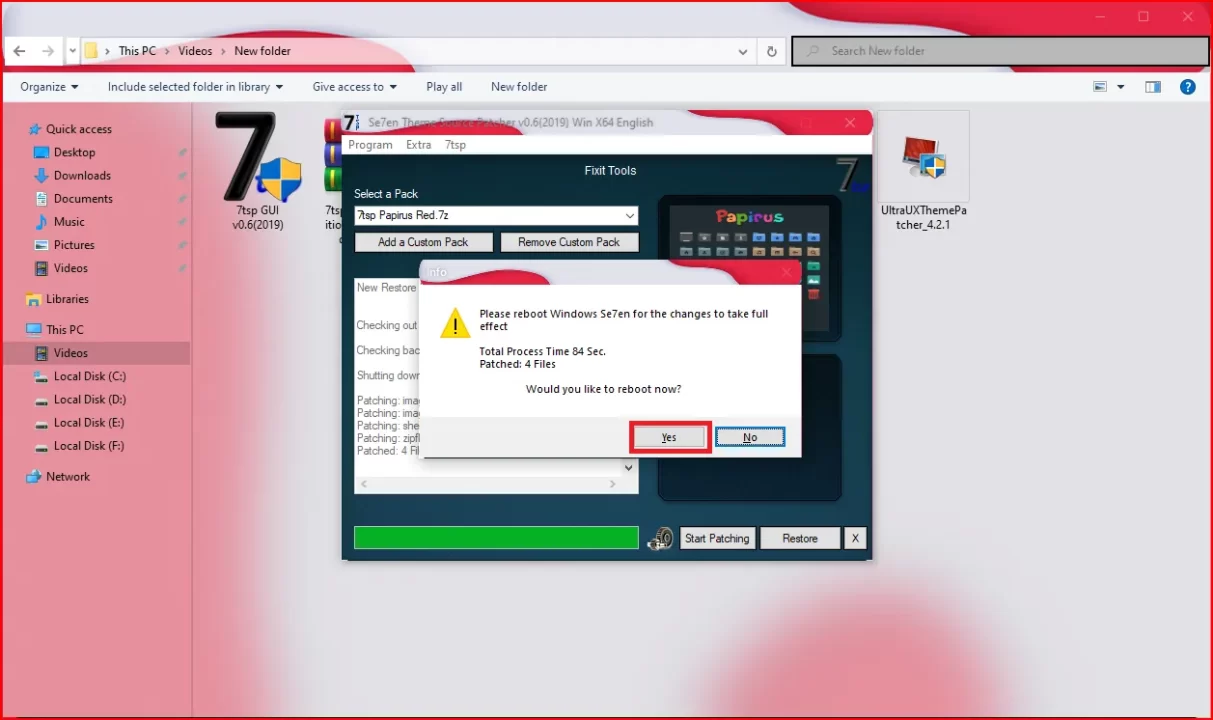
- 7tsp tool will automatically replace your default icons from the selected icon pack, it will take some time to install, so don’t turn off your computer.
- Once the process is complete, you will be prompted to restart your computer to apply the changes. Click “Yes” to do so.
How to install 7tsp
Conclusion:
Customizing your Windows with the 7tsp icon pack is a straightforward process that can breathe new life into your operating system’s appearance. Remember to choose icon packs that resonate with your personal style and preferences, and don’t hesitate to experiment with different packs to find the perfect look for your Windows 10 or Windows 11 system.
Are you new to Windows customization?
Follow the steps given on this post page and I always recommend Creating a Restore Point before starting the customization. If you have any other doubts comment below.

Hi it’s me, I am also visiting this website regularly, this
website is actually fastidious and the people are genuinely sharing nice thoughts.
Aw, this was an exceptionally good post. Spending some time and actual effort
to generate a great article… but what can I say…
I hesitate a whole lot and never manage to
get anything done.
Hi, I log on to your new stuff like every week. Your humoristic style is witty, keep up the good work!
I think this is among the most important info for me.
And i am glad reading your article. But should remark on few general things,
The website style is wonderful, the articles is really great : D.
Good job, cheers
Good day I am so delighted I found your blog page, I really found you by accident, while I was
searching on Askjeeve for something else, Regardless
I am here now and would just like to say many thanks for a fantastic post and a all round exciting blog (I also love the theme/design),
I don’t have time to read it all at the minute but I have bookmarked it and also added your RSS feeds,
so when I have time I will be back to read more, Please do
keep up the superb b.
Hey There. I found your blog the usage of msn. That is a very well
written article. I’ll make sure to bookmark it and come back to read
more of your helpful information. Thank you for the post.
I will certainly return.
Woah! I’m really digging the template/theme of this website. It’s simple, yet effective. A lot of times it’s difficult to get that “perfect balance” between user friendliness and visual appeal. I must say that you’ve done a fantastic job with this. Additionally, the blog loads very quick for me on Safari. Superb Blog!
Thanks for sharing your thoughts on tech solutions.
Regards
A fascinating discussion is definitely worth comment.
I think that you ought to publish more on this subject, it
may not be a taboo subject but usually people don’t speak about these subjects.
To the next! All the best!!
This post is worth everyone’s attention. Where can I find out more?
I loved as much as you will receive carried out right here. The sketch is tasteful, your authored material stylish. nonetheless, you command get got an edginess over that you wish be delivering the following. unwell unquestionably come more formerly again since exactly the same nearly very often inside case you shield this hike.
WONDERFUL Post.thanks for share..extra wait .. …