
How To Create Windows Restore Point In a Simple Way
What is Restore Point and what are its uses?
Restore Point is a function that takes your Windows from its current state to its previous state.
This restore point will help you get rid of any bugs or viruses that you may have encountered with your newly installed application.
Note: Restore Point is created automatically when you install some software on your Windows, and you need to manually create Restore Point when testing new and unfamiliar software.
How To Create Windows Restore Point
Step: 1
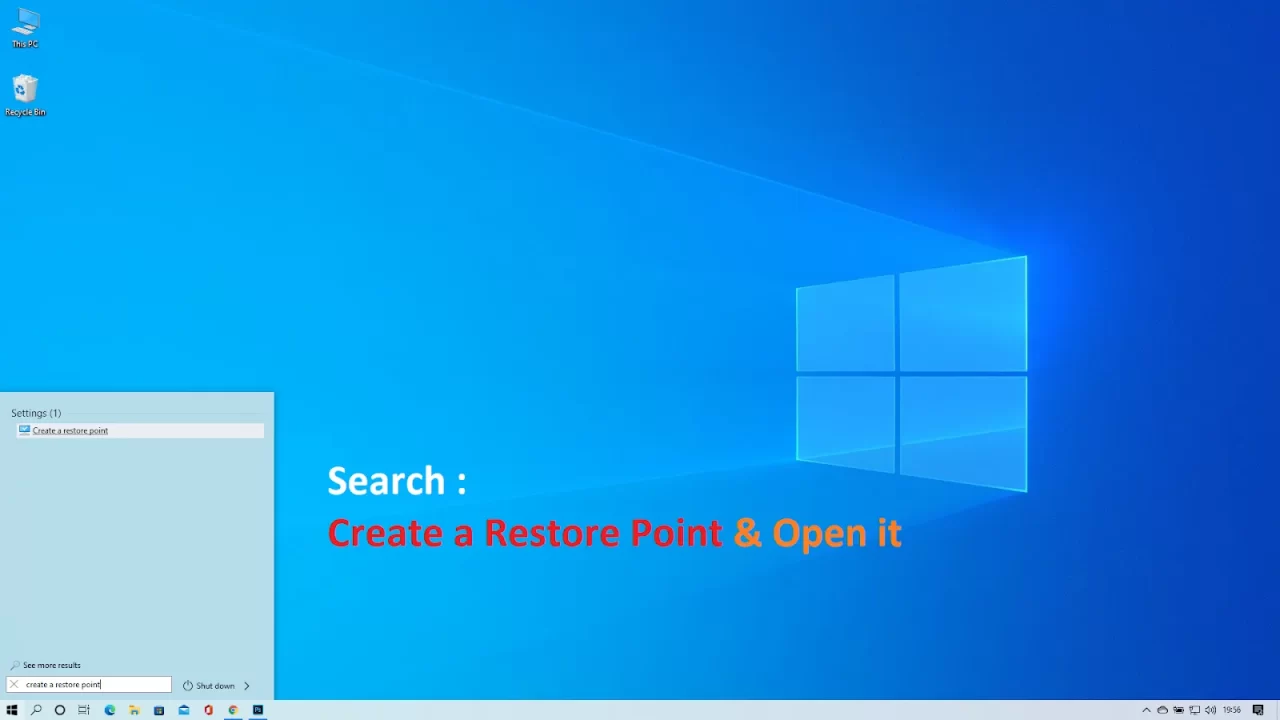
Step: 2
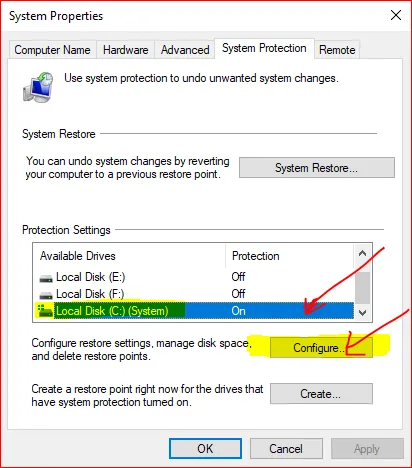
Step: 3
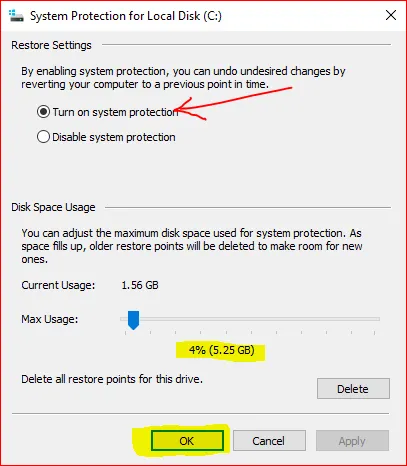
Step: 4
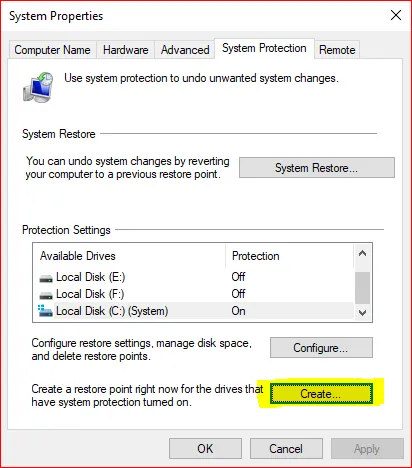
Step: 5
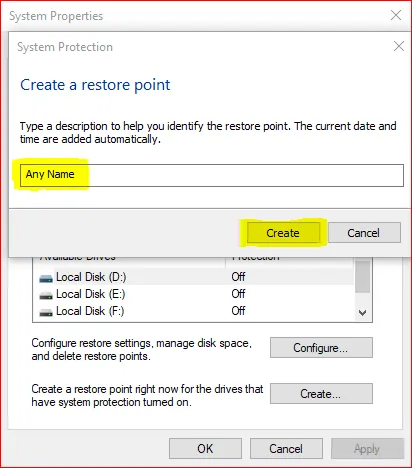
Step: 6
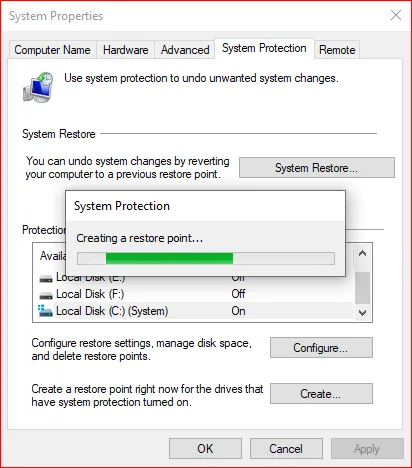
Step: 7
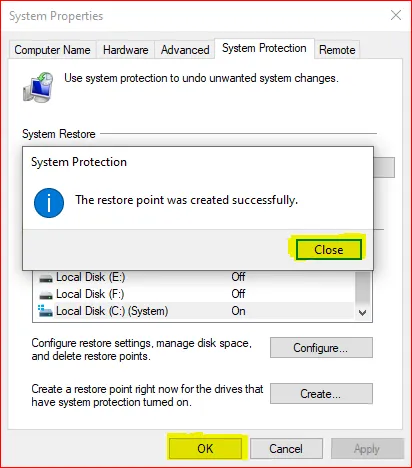
Tips: Sometimes Windows 7 gets stuck on the welcome screen and you can use a restore point to restore Windows 7 without data loss. This video will help you Restore Other Windows.
Are you new to Windows customization?
Follow the steps given on this post page and I always recommend Creating a Restore Point before starting the customization. If you have any other doubts comment below.




of course like your web-site however you need to test the spelling on quite a few of your posts. Many of them are rife with spelling problems and I in finding it very bothersome to inform the truth on the other hand I’ll surely come back again.